Starting the Motor
Whenever you start ANY Paramotor, you MUST be very careful to ensure that the frame is securely fastened to a solid Paramotor Carrier, Trailer Hitch Rack, leaned securely against some kind of restraint or on your back where it cannot get away from you should the throttle accelerate or stick unexpectedly.
THIS IS THE MOST COMMON ACCIDENT IN PARAMOTORING - DO NOT WAIVER IN YOUR COMMITTMENT TO ADHERE TO THESE STEPS!!!
Starting the Minari Paramotor (no Clutch)
Pull the Starter Handle gently until it catches. You may need to give it a gentle "flick" for the pawls to catch. DO NOT pull hard when the Starter is not engaged! This will damage the Starter Pawls and void the warranty. Once you have the pressure, pull the Starter handle quickly and firmly through 2 revolutions of the engine. DO NOT pull the Starter to the end of its cord, this will damage the Starter Spring and void the warranty.
NEVER use the Starter to prime or bring fuel to the carburetor, this will result in too much wear on the Starter system! Learning to properly prime your Minari Paramotor is very important. It should start within 2-3 pulls of the Starter, and never more than 5 pulls.
If the engine does not start within 5 pulls, it has not been primed properly. It either needs more fuel, or is flooded with too much fuel. The Minari engine does need to be good and wet, so sometimes another priming will get it what it needs. If it is flooded, remove the spark plug and observe whether the plug is wet. If it is, let the plug and cylinder dry out a bit before replacing the plug. DO NOT pull the starter while the plug is out or damage may occur!
Starting the Clutched Version - Easy Start
The Easy Start on the clutched Minari requires a different set of strokes to properly turn the engine over to start. Set your paramotor on your stand and secure it, or use one of the other above mentioned methods to ensure safety. Prime the engine as discussed in the last section, then pull the starter cord gently turning the crank over slowly until the first two "gaps" are found. Now bring the handle back to the inox hook and find and catch the pawls. Give a short, quick and energetic pull to kick over the spring assisted Easy Start. Do not pull the starter out very far, and never pull it to the end of the starter cord or damage will occur.
See Video:
NEVER use the Starter to prime or bring fuel to the carburetor, this will result in too much wear on the Starter system! Learning to properly prime your Minari Paramotor is very important. It should start within 2-3 pulls of the Starter, and never more than 5 pulls.
If the engine does not start within 5 pulls, it has not been primed properly. It either needs more fuel, or is flooded with too much fuel. The Minari engine does need to be good and wet, so sometimes another priming will get it what it needs. If it is flooded, remove the spark plug and observe whether the plug is wet. If it is, let the plug and cylinder dry out a bit before replacing the plug. DO NOT pull the starter while the plug is out or damage may occur!
Flooded Engine:
If it is flooded, remove the spark plug and observe whether the plug is wet. If it is, let the plug and cylinder dry out a bit before replacing the plug. DO NOT pull the starter while the Spark Plug is out or damage will occur!
Another way to start a flooded engine is to enlist the help of another person to help you hold the FRAME of your paramotor as you hold the throttle on FULL (ready to ease off when it turns over), and pull the starter. It may take 6-8 pulls to bring the motor to life, as you are pushing the excess fuel out of the cylinder with this method. You will also notice a smoky exhaust as the engine starts from the excess fuel/oil mixture. Run the engine for a few minutes at different RPM's to clean out the system.
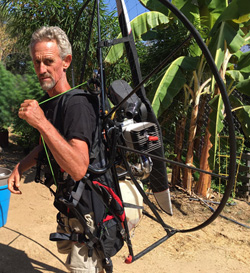
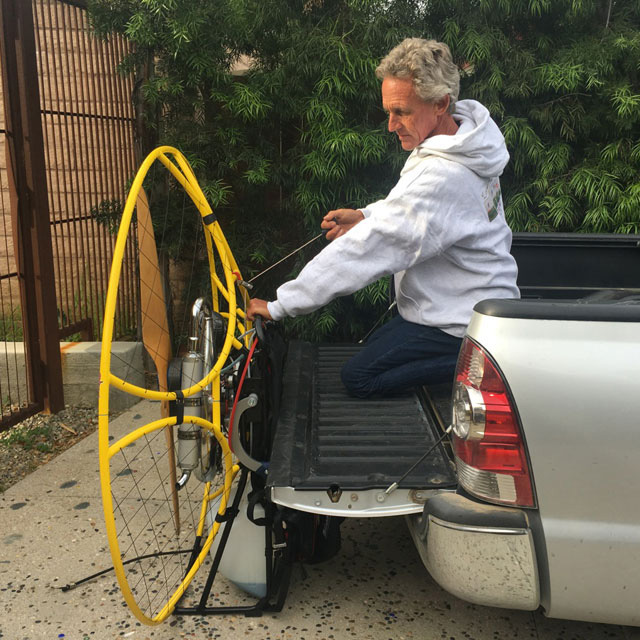
Starter Bungee
We have found that a short piece of small bungee from the Starter Handle to a point on the harness near the chest strap works great for making the starter handle very accessable - both on the ground and in the air, should a restart be necessary.
The Starter Bungee also acts as an excellent lanyard in case of a starter failure, keeping the starter handle from getting into the engine or propeller.
Click on the picture at the left to see more pictures and a short video of this Starter Bungee concept.
The next step is to Break-In your Motor.
|