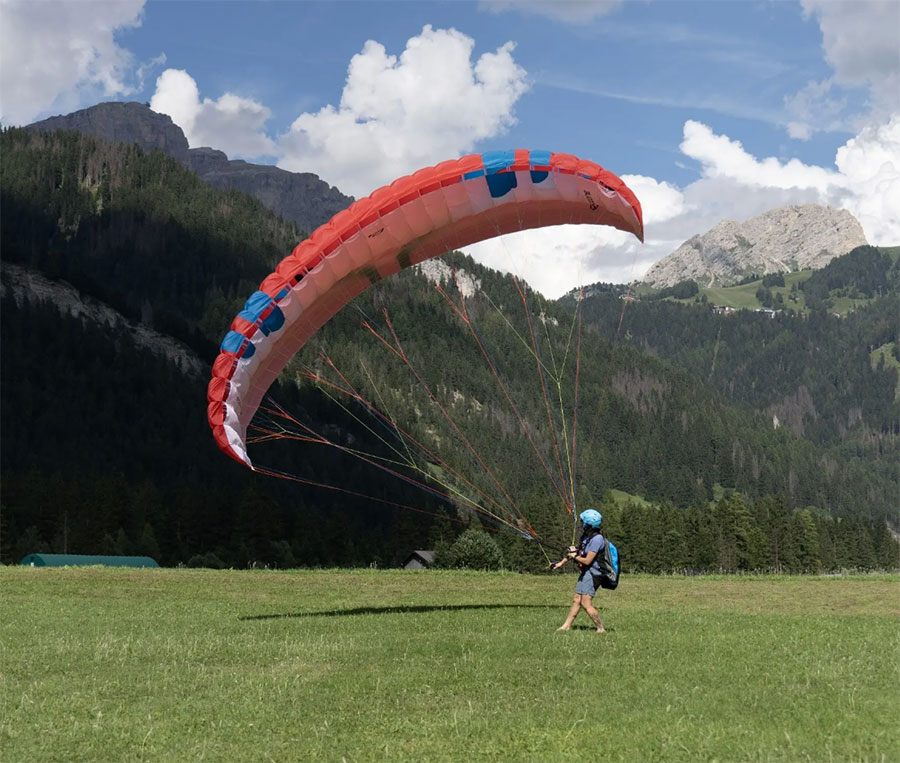
We are often asked by our students what can be done to improve the learning curve for reverse kiting with the proper brakes in hand. Visualizations have been used successfully for years by athletes for developing skills in their particular sport or activity.
Successful olympic athletes, golfers and skiiers use as much as 70 percent visualization and 30 percent actual practice. Practicing this exercise for five to ten minutes a day can lead to dramatically improved response time and better kiting control. Simply sit and focus on these techniques in a quiet place each day, and you will be surprised at the results!
Why? Because when the time comes to do the action, you will not have time to think. The thinking about what to do will need to be done ahead of time, so that when you are balancing the wing overhead, you can react immediately and intuitively. By the time you think about what to do, it will likely be too late, and the wing will flip over - AGAIN!!
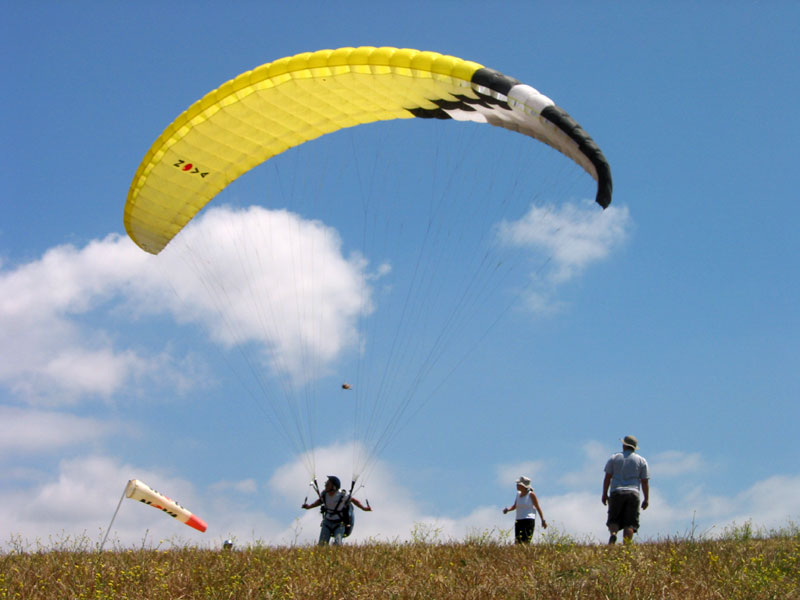
First, make sure you understand that building a wall and reverse kiting are two distinctly different things. Also, these exercises are vastly easier if you have a steady (not gusty) wind of at least 6 mph, but not more than 12 mph.
Building a Wall
Make sure you do not bring the glider overhead when you are building a wall - remember, you're not trying to fly it yet, just prepare it for a perfect inflation.
In this exercise, you will be using your A Risers and Rear Risers to spread your glider out and check the lines for tangles or sticks. A Risers accelerate the wing, and Rear Risers effectively brake the glider. Using this method of control allows you to quickly and decisively de-power the wing in the event of a wind gust or bad inflation.
Using the A Risers, accelerate the glider for a moment until it is about a foot off the ground, then release pressure on the A's and apply pressure to the Rear Risers, while leaning toward the glider bringing the wing back to the ground. If you do not bring all of the glider (both wingtips) off the ground, the wing will usually "catch" on the ground, and fly in that direction, landing in a crumpled pile.
Repeat this until you have spread the glider, centering it downwind of you. If the wing is off the wind line and too far to the left, it will slide to the right when you do this and vice-versa.
Your goal is to have every cell on the leading edge open and facing upwards to catch the wind. If one side or the other is folded over itself, or one wing does not have wind in it's cells, the glider will immediately turn in that direction. The canopy should also be balanced and not leaning to one side or the other. Continue building a wall until you get a perfect layout.
Brakes in Hand
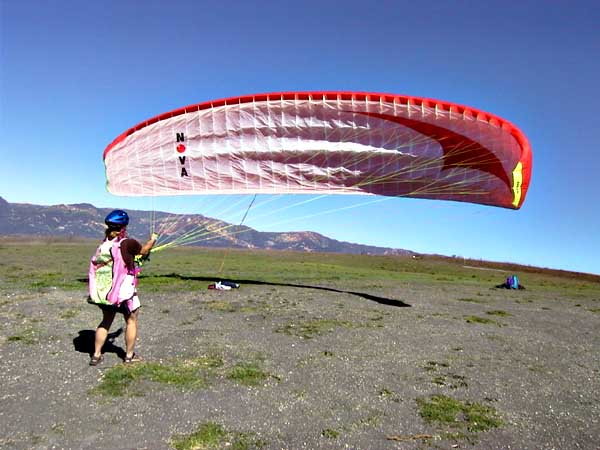
Once you have a good wall, you can get the brakes in our hands and bring the glider overhead for kiting. Make sure you have the correct brake in each hand, with a clean "V" where the brakes go from your hands down to the brake pulley or guide, then back up to the caribiner attached to your harness. Often, these caribiners get twisted when you turn to kite in the reverse position, so check this part of your preflight carefully. This is perhaps one of the most common places where new pilots make a mistake, so spend a few seconds and get this right.
Bring the wing overhead with the brakes in your hands, using the "A" and rear risers exactly as you did for building a wall. When inflating, do not pull too hard on the "A" risers, but rather, use the harness as well as the risers to apply pressure to the wing, stepping backwards into the wind. Your inflation should be smooth and deliberate, bringing the glider overhead in 2-3 seconds.
If you inflate the glider too slowly, the glider will "waddle around" at about 45 degrees and be difficult to control.
If you bring the wing up too quickly, it may overfly you and collapse. To avoid this, slow the glider when it reaches the flying position over your head, by applying a moment's pressure on the rear risers. Don't pull the glider back to the ground, just use a quick "pop" to keep it from overflying you.
Once overhead, the wing is now cutting through the air, supported by the lines and risers and there will be little wind resistance. When the glider is overhead, do not pull down on the "A" risers or you will cause a frontal collapse of the wing. Once the glider is stabilized overhead using the "A" and rear risers, gently release the risers and make "contact" with the brake toggles. You are now ready to control the glider in the reverse position with the brakes in your proper hands.
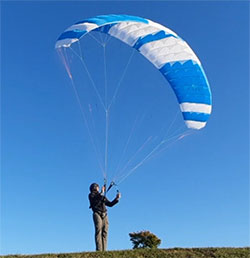
A Kiting Visualization
Visualize a "T" where the glider is the top of the "T" and the lines are the stem of the letter. This makes your position the foot of the letter, balancing the "T" over your head.
If the wing moves to your left while you are facing it (reversed), you will need to move towards the left and simultaneously pull the left brake toggle to steer the glider back into balance. You will help the wing balance even more if you seat steer the glider by facing the direction you are moving. This shortens the riser on the side you want to turn the wing towards, and sometimes this is all that is needed to balance the glider again.
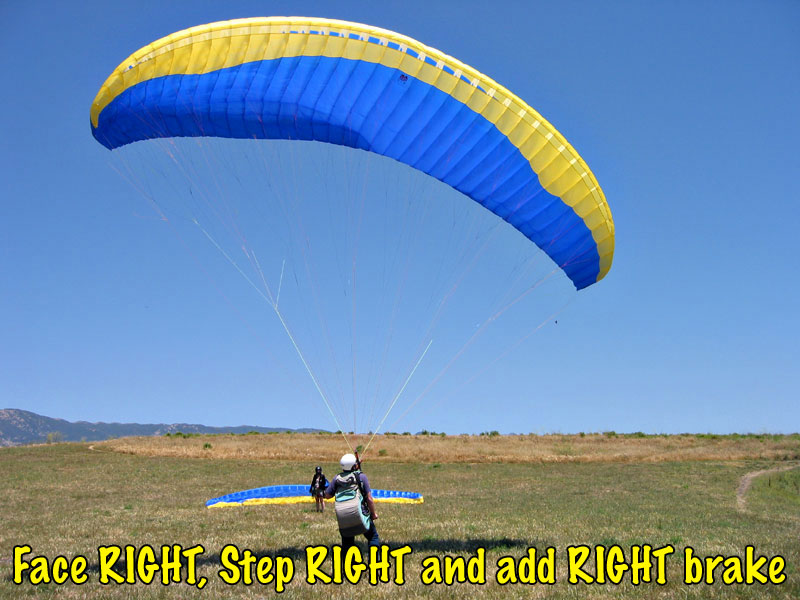
SO - If the glider falls RIGHT, face RIGHT, step RIGHT and add RIGHT brake.
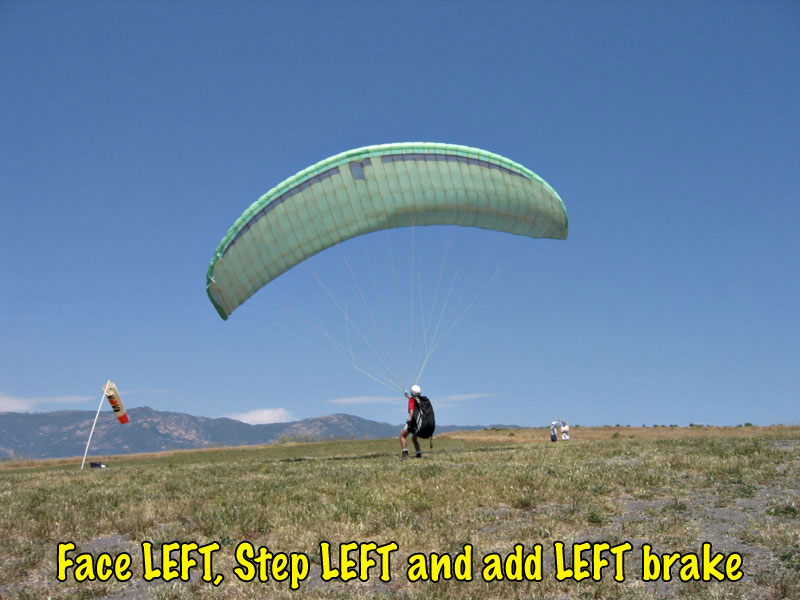
If the glider falls LEFT, face LEFT, step LEFT and add LEFT brake.
Love your Low Wing!
Another way to think of this is to pay attention to the LOW WING. If the wing moves to the left, the top of the glider is lower on the left side. Give this side the attention it needs by facing your body towards it, moving towards it and applying the brake on that side (point at the ground under the low wing).
When you move towards it, do not decrease the pressure you need to keep the glider flying (by walking downwind towards the glider). Rather, face your body and move laterally towards the LOW WING, always keeping the needed pressure from the seat to the wind to keep the wing flying.
You must move with the glider to correct the balance, or it will simply fall over. In the air, this happens automatically because of gravity - if the right wing lifts due to a thermal or momentary gust, the glider leans to the left, but you swing immediately back under the
glider. On the ground, you must balance the wing yourself.
Seems simple, right? Just try it. Simple maybe, but not so easy. It goes against all your intuition about control of the wing! Remember, your right hand controls the left wing while reversed, so virtually everything is backwards!
This is a learned skill, and NO ONE gets it immediately, no matter how adept they are. Take the time to sit back and visualize the process. Practice this for a few minutes each day and you will greatly help the process of learning this skill. The more quickly you can react and respond with the correct input, the better you will be at keeping the glider overhead.
Perfect Balance
A perfectly balanced wing will be directly overhead, effortlessly flying with almost no brake input. Your hands should be directly in front of your chest, in a pose similar to a boxer. The hands are feeling the light pressure of each wing's trailing edge, ready for a "tug" to keep the wing balanced.
A "tug" is a swift, deep brake input returning to the balanced position to evaluate results. It is a movement straight down; don't reach across because you want the wing to go "that way".
A few quick "tugs" are sometimes better than holding the brake, since they allow the wing to continue flying rather than stalling the glider.
The sooner you recognize the glider has shifted out of balance, the less input you will need to correct it. Remember:
If the glider falls LEFT, face LEFT, step LEFT and add LEFT brake.
If the glider falls RIGHT, face RIGHT, step RIGHT and add RIGHT brake.
Practice reverse inflation and kiting, then turn forward and control the glider for a few seconds, then turn back around again and continue reverse kiting. This is the entire inflation to launch and post landing sequence.
Practice kiting the glider facing forward as well. Use the reverse inflation to balance the wing overhead. Then, when it is in control, look at the horizon when you turn to face forward. Do not keep your eyes on the wing when you turn, or you may become disoriented. Instead, follow the horizon around into the wind, feeling the 'seat to wind' pressure while keeping the wing overhead. You will also be able to see the risers easier this way, and avoid catching them on your face and helmet!
Forward Kiting
When kiting the wing while facing the wind (forward kiting), concentrate on feeling the glider. learn to notice when the risers shift out of balance without looking at your wing. Develop a sense for this by using your peripheral vision of your risers. Feel also, the tug of your glider going out of balance, pulling you to the side. Balance it by moving towards the tug, but steering away from it - back into the wind.
Do not stand and watch your wing in the forward kiting position. It is very likely you will not maintain the pressure needed to keep the glider overhead. Instead, concentrate on the horizon in the direction you feel the wind coming from and actively feel the balance. It's like 'dancing' with your glider. If it moves to one side, dance with it a bit, but lead your partner back where you want them to go.
When you feel the wing falling back, act quickly! Turn back to the reverse position and take control of your glider immediately! Letting the wing fall behind you while facing forward in wind can be dangerous because most people have a tendancy to lower their hands, which applies the brakes and pulls them backwards. The result is that you will often land on your rear and get dragged.
By turning back to the reverse kiting position quickly when the glider is falling back, you can now lean back in the seat towards the wind and balance the wing. You will tend to keep your hands higher in this position, pulling less brake and allowing the wing to come back overhead. If the glider does continue falling, you can walk forward toward the glider instead of being pulled backwards. Reset by building a wall, then practice some more!
Stop Looking at your Wing!
As you progress, it will benefit you greatly to STOP looking at your wing. Perhaps this seems counterintuitive, but the sooner you begin this practice, the sooner you will truly master glider control. This true of both reverse and forward kiting.
Think about it - When you are flying, you are not going to be looking at your wing. You wouldn't be able to navigate if you are looking up at it!
While forward kiting on the ground, if you look up at the glider the whole time, you will get dizzy! It is near impossible to kite facing forward because you can't effectively keep the pressure on the wing unless you lean forward into the wind (torpedo position).
When you first inflate the glider facing the reverse position, you will inspect the lines and glider for imperfections - sticks, knots, anything that would be better sorted out on the ground rather that once you get airborne! This should only take a few seconds, scan the leading edge, then train your eyes to scan the trailing edge, also checking the wingtips as you follow around the shape of your wing.
Then - look out at the horizon and feel the pressure on your brakes, feel the balance through the risers connected to your harness. If you need, you can always check the glider with a quick glance, but constantly looking up at it will be unnessesary and make your neck sore!
The real payoff to this practice will come when it is time to switch from the reverse to forward kiting position. Always bring your eyes back to the horizon before you turn to face forward. Follow the horizon around with your eyes as you turn and keep the pressure steady against the risers. If you are looking up, I guarantee you will lose your balance trying to continue looking at your wing.
Make it a Game!
Kiting practice can be really fun, and it feels so good when you develop these skills of control of your glider. This is especially true if you have a smaller and lighter kiting practice glider made specifically for this practice.
Having a smaller glider to practice kiting allows you to do your exercises in higher wind, just be careful it's not too much! You will find that your reflexes will improve more quickly as well because a smaller, lighter wing is so sensitive to your inputs.
Check out the new Sidekick Kiting Wing or the Ozone Roadrunner.
Some Fun Stuff to Try:
- Bring out your boom-box and do a little Kite-Dancing to practice!
- Bring some small cones or bowls and make an obstacle course to navigate while kiting!
- Set two points about 20 yards apart across the direction of the wind and try to run from one point to the other while kiting!
- Practice kiting in perfect balance - but - also try kiting out of balance! Bring the glider intentionally over to one side and hold it there. See how long you can hold the tip just touching the ground! You'll find that practicing this makes kiting in balance even easier.
- Get together with other new pilots and get into a 'Kiting War' trying to bring each other's wing to touch the ground.
- I'm sure you can think of even more ways to make this practice fun.
Why Reverse Kiting?
If reverse kiting is so difficult, why do we do it this way? Safety, Safety, SAFETY!
First of all, when using this method, the reverse inflation allows you to inspect the glider carefully while facing it. If there is a tangle or twig in the lines or canopy, you can quickly immobilize the glider and correct the problem.
If you happened to get lifted off the ground in strong launch conditions, you already have your brakes in your hands. You are ready to control the glider without looking for the brake toggles. Even if you don't get lifted up while reversed, when you turn to launch, your brakes are already in your hands, and you can keep the glider in control much better.
Once you have mastered reverse kiting, your confidence at launching will also increase, because you know how to control your glider in both the forward and reverse positions.
Enjoy the journey! |